


The instrument cluster of a contemporary vehicle looks less like a utilitarian dial board and more like the glass cockpit of a modern jetliner. Between digital screens, head-up readouts, and backlit gauges, dozens of microprocessors monitor internal combustion, hybrid drives, hydraulic pressures, and sensor networks in real time. For many motorists, this vast ecosystem of illuminated alerts is intimidating. When a glowing graphic suddenly pierces the dashboard display during an evening commute or a cross-country journey, the initial reaction is often a mix of anxiety, confusion, and denial. Drivers frequently wonder whether that glowing icon represents an impending engine detonation, an incidental software glitch, or merely a reminder that the outside temperature has plunged near freezing.
This comprehensive guide serves as your authoritative field manual for interpreting and responding to these alerts. By breaking down warning lights by urgency tier, explaining the underlying mechanical principles, and detailing the precise operational procedures required when each light activates, this manual empowers you to protect both your capital investment and your life on the road.
1. The Code Red Tier: Warning Lights That Require an Immediate Emergency Stop
The highest operational tier on your instrument cluster features alerts that permit no delay. When any of the following warnings illuminate in red or begin blinking frantically, your sole objective as a driver is to execute a safe, controlled emergency stop out of moving traffic and shut off the propulsion system immediately.
Shutting Down Before Catastrophic Engine Seizure
The red oil can icon, frequently paired with the text Engine Oil Pressure Low, is arguably the most lethal warning light on any dashboard. A pervasive myth among casual drivers is that this icon simply indicates you are due for an oil top-off. In reality, this sensor monitors dynamic fluid pressure within the engine galleries, not the static volume sitting in the oil pan:
-
The Mechanics of Hydrodynamic Lubrication: Internal combustion engines rely on a pressurized layer of motor oil measuring mere thousandths of an inch to keep hardened steel and aluminum surfaces from making direct contact. The crankshaft journals, connecting rod bearings, camshaft lobes, and hydraulic lifters float entirely on this pressurized film.
-
The Rapid Failure Sequence: When oil pressure plunges below manufacturer parameters (typically under 5 to 10 PSI at idle), metal-on-metal friction creates extreme kinetic heat almost instantaneously. Bearing shells spin out of alignment, piston rings score cylinder walls, connecting rods shatter, and camshafts seize inside the cylinder head. An engine run without oil pressure can destroy itself completely in less than twenty seconds.
-
Immediate Action Protocol: Shift into neutral, switch on your hazard lights, and steer directly to the nearest safe shoulder or turnout. Once parked, immediately shut off the ignition to stop the rotation of the internal components. Do not attempt to drive to a mechanic or complete your commute. Pull the hood release, wait a few minutes for residual oil to drain back into the pan, and inspect the dipstick. If the dipstick reads empty, adding oil might restore pressure if the issue was low fluid volume; however, if the dipstick shows oil, you are dealing with a failed oil pump, a clogged pickup screen, or ruptured internal passages. Under no circumstances should you restart an engine that shows adequate oil while the red pressure warning light remains glowing.
Halting Hydraulic Collapse and Drivetrain Disasters
The braking system represents your vehicle’s single most critical safety mechanism. Two primary red indicators monitor its operational health: the illuminated word BRAKE (or a red exclamation point enclosed within a circle and parentheses) and the anti-lock brake advisory. While this symbol illuminates routinely when the mechanical parking brake is engaged, an unprovoked illumination during normal transit warns of acute hydraulic compromise:
-
Dual-Circuit Degradation: Modern brake master cylinders use a split-circuit design so that a leak at one wheel does not instantly disable all four brakes. However, when fluid volume in the master cylinder reservoir drops below the minimum sensor line, air enters the hydraulic lines. Because air compresses under force while hydraulic brake fluid does not, pressing the pedal will simply compress the air bubbles rather than driving the brake pads against the rotors.
-
Pedal Feel Diagnostic: If the red brake light activates and the brake pedal feels spongy, sinks uncontrollably toward the floorboard, or requires repetitive pumping to create resistance, your hydraulic integrity is actively failing. Downshift through lower gears manually to let engine compression slow the vehicle, smoothly apply mechanical handbrake tension without locking the rear wheels, and steer carefully toward an open run-off area.
-
The Flashing Check Engine Light: While an amber, steadily glowing check engine light is categorized under advisory alerts, a flashing or blinking check engine light signals an emergency. A blinking check engine light means the engine is experiencing an active, continuous cylinder misfire of severe magnitude. When an engine misfires, unburned raw fuel passes out of the exhaust valves and travels directly into the catalytic converter. The converter, which typically operates between 1200 and 1600 degrees Fahrenheit, acts as an incinerator for this raw fuel, driving internal core temperatures above 2000 degrees. This heat melts the ceramic honeycomb substrate, creates massive exhaust backpressure, and creates an acute underbody vehicle fire hazard. The moment the check engine light flashes, you must pull over and shut down the vehicle to prevent costly emissions system damage.
When confronted with sudden hydraulic collapse, severe misfires, or complete electrical shutdowns, attempting to nurse a vehicle down highway lanes or side streets is an enormous liability. The safest course of action is to step outside the vehicle once parked safely away from traffic barriers and summon a flatbed through a car towing service. Dragging or flat-towing modern all-wheel-drive or automated vehicles on their drive wheels can shear internal differentials and lock transfer cases; flatbed transport protects delicate mechanical running gear from further destruction.
Similarly, severe drivetrain faults are communicated through illuminated red gear icons, high-temperature transmission warnings, or rapidly flashing gear selector displays. These alerts point to internal slippage, torque converter clutch failure, or valve body starvation. Continuing to drive while internal clutches slip creates extreme friction that burns fluid, welds planetary gear sets together, and shreds internal bands. Addressing these symptoms immediately through a comprehensive transmission repair allows technicians to rebuild clutch packs or service mechatronic units long before the casing itself suffers irreversible catastrophic destruction.
2. Critical Steering, Suspension, and Chassis Warnings
Modern vehicles rely on electronic control units to balance steering resistance, vehicle yaw, and passive restraint ready-states. When chassis and steering indicators illuminate, the driver loses digital driver-assistance fail-safes, requiring immediate operational adaptations and technical correction.
Restoring Structural Dynamics and Suspension Symmetry
Sudden impacts with deep road craters, sunken manhole covers, or roadway debris often generate chassis warning lights by knocking vehicle geometry out of dynamic tolerance:
-
The Steering Angle Sensor Dilemma: Modern stability control programs cross-examine the angle of the steering column against real-time yaw sensors and individual wheel-speed monitors. If a hard curb impact slightly bends a tie rod or knocks an eccentric cam out of position, the car may drive straight while the steering wheel is held at a slight angle. The vehicle computer registers this permanent offset as a continuous, uncontrolled skid, eventually disabling stability management and illuminating dynamic suspension caution lights.
-
The Mechanical Solution: Restoring this vital balance requires a specialized multi-angle wheel alignment. Technicians use precision laser arrays attached to all four wheels to measure toe, camber, and caster angles down to hundredths of a degree, adjusting threaded sleeves and control arm eccentrics back to factory specifications before recalibrating the internal steering angle sensor back to zero degrees.
-
Impact Trauma Beyond Surface Alignment: When an impact involves high kinetic energy, the damage frequently extends past simple adjustable alignment bolts into cast aluminum knuckles, subframe mounts, unibody crumple zones, or stabilizer links. Attempting to force an alignment on a buckled chassis will cause continuous tire wear and erratic handling under heavy braking. Vehicles that exhibit persistent dog-tracking, uneven ride height, or body seam gaps require laser measuring systems and dedicated frame racks found at an auto collision center. Expert structural repairs pull distorted pickup points back to factory tolerances, ensuring suspension links articulate properly and sensor systems communicate clearly.
3. Amber Alert Level: Navigating Powertrain and Diagnostic Trouble Codes
Amber and yellow indicators function as early warnings. They indicate that your engine, transmission, or emissions control system is functioning outside optimized parameters, but the internal combustion sequence is not facing immediate mechanical destruction.
Deciphering the Check Engine Light and Diagnostic Codes
The Check Engine Light (CEL), technically termed the Malfunction Indicator Lamp (MIL), appears as an abstract engine silhouette. It is linked to the vehicle’s onboard diagnostics system (OBD-II), which constantly polls hundreds of data streams:
-
Solid Illumination Protocol: When the check engine icon illuminates amber and remains solid without blinking, there is no need to make an emergency dive for the road shoulder. You can finish your immediate trip safely. The computer has simply registered a fault code that has occurred during two or more consecutive operating cycles.
-
Understanding Diagnostic Trouble Codes: A scan of the vehicle via the diagnostic port located beneath the steering column retrieves an alphanumeric code. For example, a code like P0171 indicates a lean fuel condition on Bank 1, often caused by an unmetered vacuum leak or a contaminated Mass Airflow sensor. A P0442 code indicates a small evaporative emissions leak, which can be caused by a cracked vapor canister hose or an unsealed fuel tank cap.
-
Diagnostic Pitfalls: A common error among motorists is assuming the code explicitly dictates which part to replace. A code indicating an oxygen sensor circuit fault rarely means the sensor itself is defective; more often, it indicates the sensor is accurately reporting an upstream air-fuel mixture imbalance caused by a leaking exhaust manifold gasket or a dripping fuel injector.
To properly isolate the cause of an amber light, vehicle owners should collaborate with a qualified local auto mechanic who uses bi-directional scanning platforms. These tools go far beyond basic code readers by monitoring real-time sensor data, long-term fuel trim maps, and commanded ignition timing while the engine is running. Furthermore, when persistent diagnostic codes stem from electrical ground issues, damaged wiring harnesses tucked inside crushed inner fender wells, or misaligned structural brackets, partnering with a multi-discipline local auto body shop allows technicians to fix the underlying physical and electrical problems simultaneously.
4. Tire, Traction, and Contact Patch Warnings
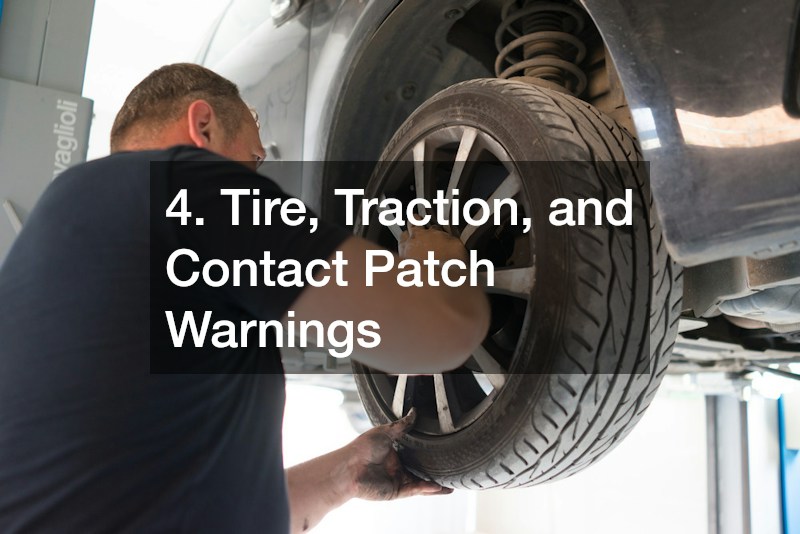
Your tires represent the only physical point of contact between thousands of pounds of moving steel and the asphalt surface. Consequently, dashboard warnings related to tire pressures and traction control directly govern basic vehicle control.
Managing Traction Loss, Rim Damage, and Tread Failures
Traction Control Systems (TCS) and Electronic Stability Programs (ESP) use a yellow symbol of a car with squiggly skid lines underneath. Deciphering this indicator depends entirely on whether it is flashing or solidly lit:
-
A Flashing Traction Light: The system is actively working. Your wheel speed sensors have detected loss of traction over wet roads, ice, gravel, or through aggressive throttle application. The computer is automatically pulling back engine throttle and pulsing individual brake calipers to restore grip. Ease off the accelerator smoothly until the light stops flashing.
-
A Solid Traction Light: The system has turned itself off, either because you pressed the mechanical traction override button or because a system component, such as a wheel speed sensor, has failed. Without active traction management, the vehicle handles like an older car without stability control. Extreme caution is needed on slick roads.
Damaged wheels are a common cause of mysterious tire pressure drops and stability control errors. Running over jagged potholes can bend aluminum alloy wheel rims along the inner barrel, cracking the bead seat and allowing pressurized air to escape slowly while introducing severe high-speed balance vibrations.
Instead of immediately replacing an expensive factory wheel assembly, motorists can often restore bent lips, hairline cracks, and structural imbalances through qualified local wheel repairs. Specialist facilities use hydraulic straightening equipment, TIG welding, and precision CNC lathe machining to true the wheel back to zero lateral and radial runout.
When handling small punctures caused by roadway debris, motorists must also insist on industry-standard tire service. Punctures located in the tread face are completely fixable if caught before the tire is driven on while flat. However, simply using a rope plug from the outside is an unsafe, temporary fix. Proper tire repair involves dismounting the tire from the wheel, carefully inspecting the interior inner liner for heat-stressed rubber dust, reaming the puncture channel, and vulcanizing a combined one-piece patch-and-plug unit from the inside out. Punctures located on the shoulder or sidewall cannot be safely repaired due to continuous structural flexing, requiring complete tire replacement to prevent a highway blowout.
5. External Sensors, Visibility Systems, and Body Integrity Alerts
The modern dashboard reflects an intricate web of active and passive driver assistance technologies. Digital clusters present warnings for autonomous emergency braking, blind-spot monitoring, radar cruise control, and cross-traffic alerts. Understanding why these exterior sensors fail requires looking at the physical exterior of the vehicle.
Defending Vehicle Surfaces and Preserving Sensor Calibration
Because radar transponders and dynamic camera lenses are aimed with extreme precision, their operating health is directly tied to the condition of your vehicle’s exterior body panels:
-
Shielding Delicate Forward Sensors: The front bumper of any modern car is exposed to constant sandblasting from highway gravel, road salt, and airborne stones. If the durable, smooth finish on a radar-transparent front emblem becomes pitted or cracked by flying road debris, the radar beam can scatter and return inaccurate tracking data, triggering system shutdowns. Applying high-performance paint protection films across the front fascia, bumper grilles, and mirror caps creates a durable, shock-absorbing barrier. This clear, impact-absorbing urethane layer prevents rock chips, stone gouges, and salt corrosion from degrading the exterior surfaces that sit directly in front of expensive sensor systems.
-
Correcting Bumper Distortions and Sensor Alignment: Even minor low-speed parking lot scrapes can crack internal plastic bumper clips, knock sensor brackets out of alignment, or tear internal mounting tabs without showing severe exterior paint damage. However, if an internal radar or ultrasonic mount is displaced by just one or two degrees, that small angular error compounds into a substantial tracking error fifty yards down the highway. The forward collision system will begin seeing ghosts in adjacent lanes or fail to recognize vehicles directly ahead, prompting the vehicle computer to shut down and illuminate safety warning lights. Correcting these hidden structural issues requires precise local auto body repairs. Technicians remove damaged bumper covers, replace broken support clips, and position the vehicle on calibrated target boards to electronically aim and zero every sensor, guaranteeing that your safety equipment performs properly when you need it most.
By treating these optical alerts as helpful diagnostic data rather than an unwelcome surprise, you take proactive control of your vehicle’s mechanical health. Responding promptly with correct diagnostic scans, disciplined maintenance protocols, and high-quality repairs prevents minor component wear from turning into total mechanical breakdowns. In an era where modern automobiles are deeply complex technical machines, learning to quickly interpret and respect your dashboard warnings is the definitive way to protect your budget, extend the working lifespan of your vehicle, and ensure every trip is safe.